Need to migrate your Windows system to a new SSD or HDD? Want to change or upgrade your disk? Looking to convert a dynamic disk to a basic disk without data loss? Or perhaps you need to make a backup of your system or partitions and then restore from it?
In all these cases, CloneGo is the ideal solution.
1. Migrate Your Windows OS or Partition to Another Location
2. Back up Your Windows OS or Partition and Restore from Backup
4. Create a Bootable WinPE USB to Get Data Without Logging in
Step 1: Install CloneGo on your Windows PC or Windows Laptop after downloading it.
Step 2: Launch CloneGo and select "Copy" from the left panel.
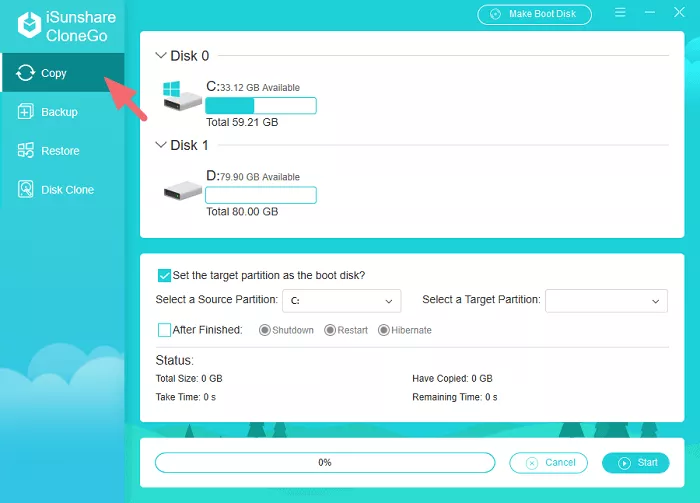
Step 3: Choose your source partition (either a non-system partition or your Windows OS partition).

Step 4: Select a target partition on your SSD/HDD.
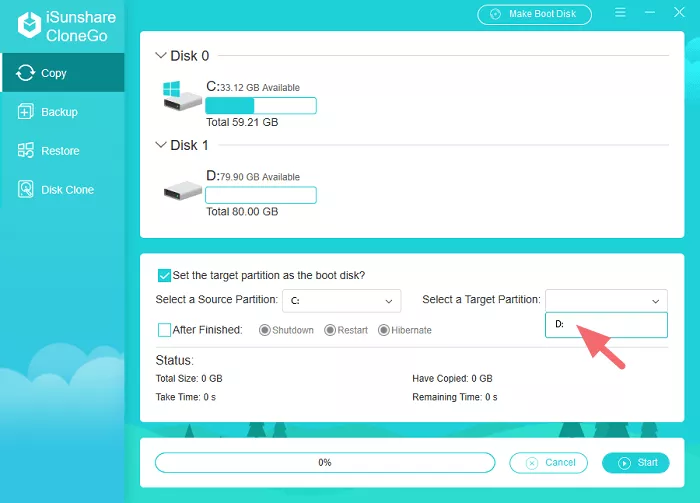
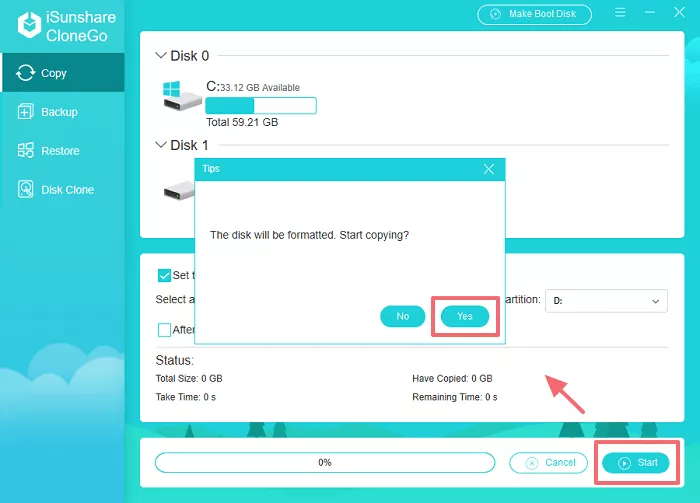
Caution: This will format the target partition. If there are some important data on it, back up them first.
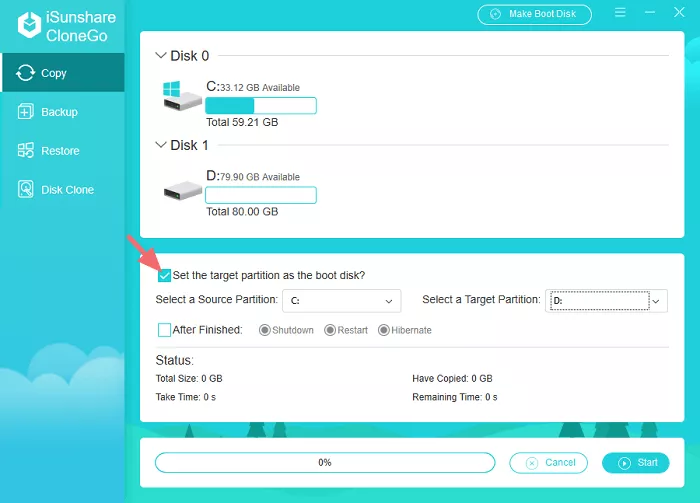
Step 5 ( optional ): For system volume migration, check "Set the target partition as the boot disk".
Step 6 ( optional ): Configure post-operation actions if desired (shutdown/restart/hibernate).
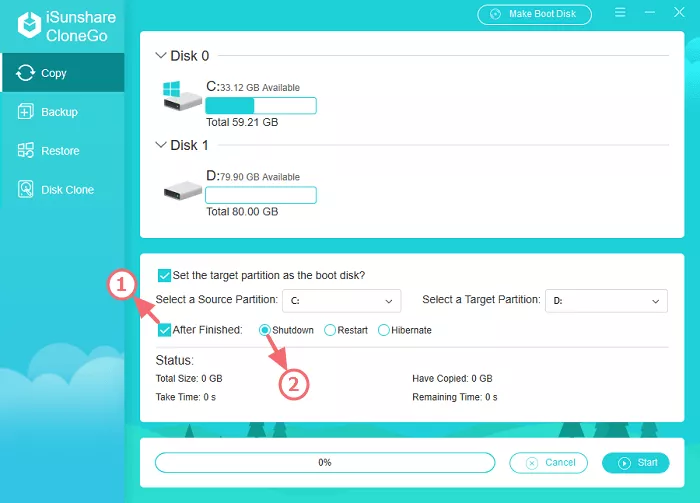
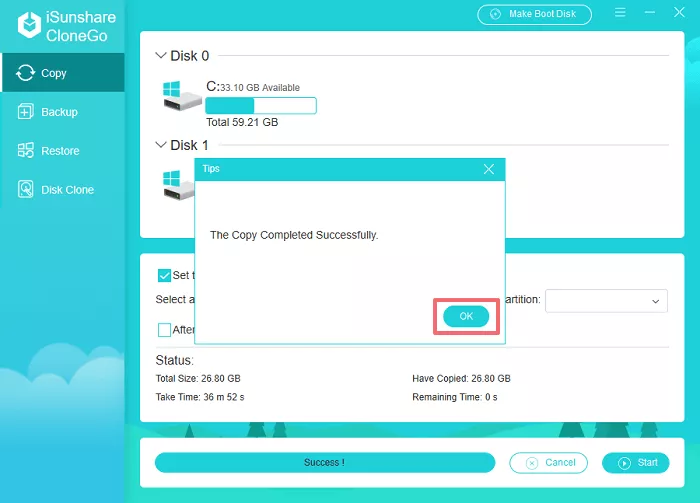
Step 7: Click "Start" and confirm to begin the copying process.
Step 8: Once complete, you can boot from the new location by adjusting BIOS/UEFI settings.
Step 1: Select "Backup" from the left panel.
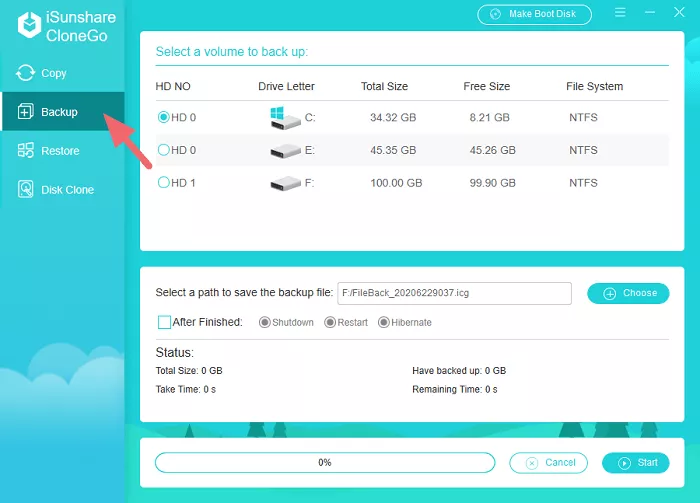
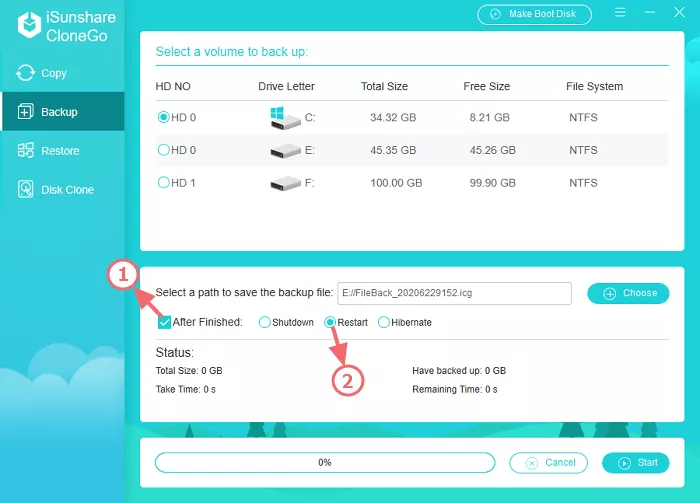
Step 2: Choose the partition or Windows system to back up.
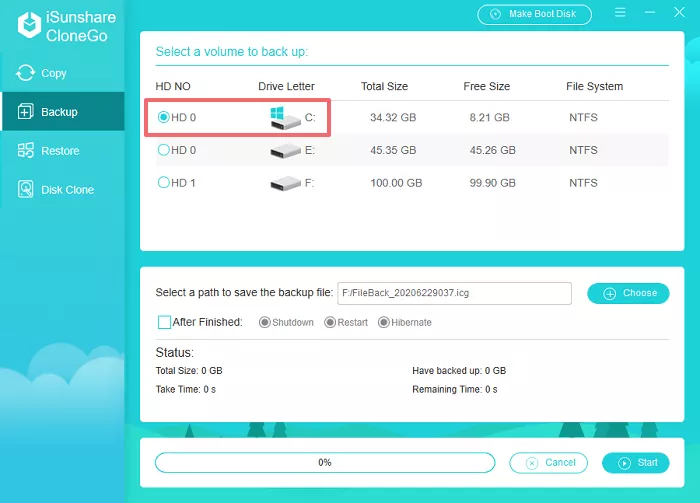
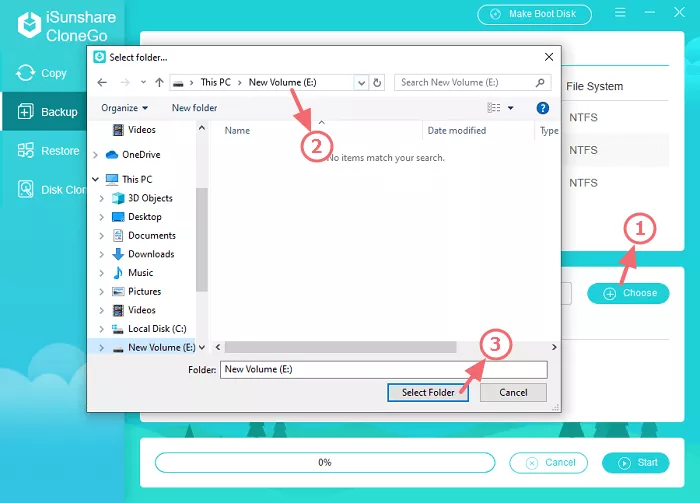
Step 3: Specify a location to save the backup file.
Step 4 ( optional ): Set post-backup actions if needed.
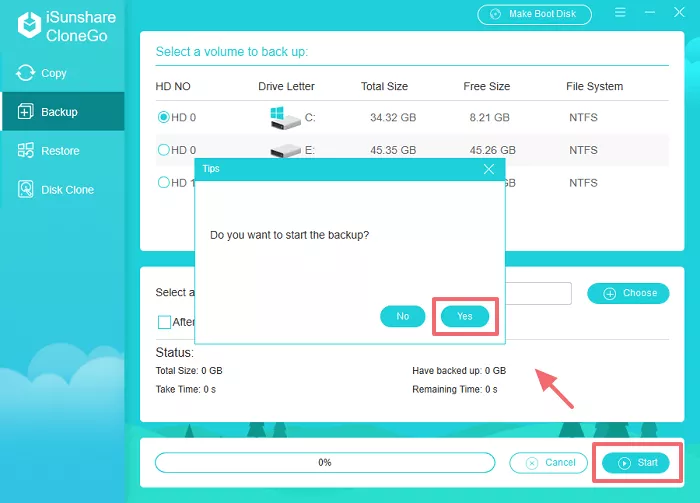
Step 5: Click "Start" to create the backup.
Step 6: Once the backup is complete, you'll find the corresponding icg file in the corresponding location.
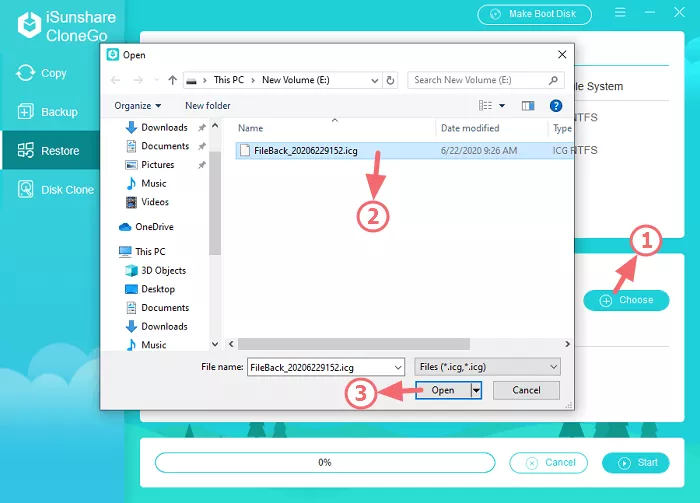
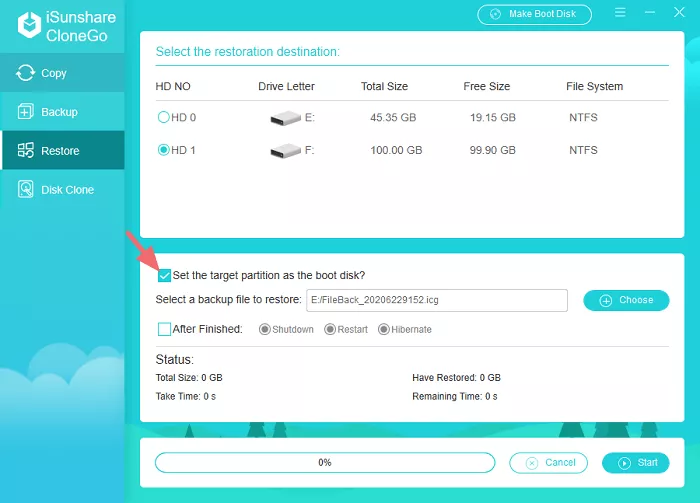
Step 1: Go to the "Restore" function.

Step 2: Select a destination partition for restoration (cannot be the current system partition or the partition where the .icg file resides).
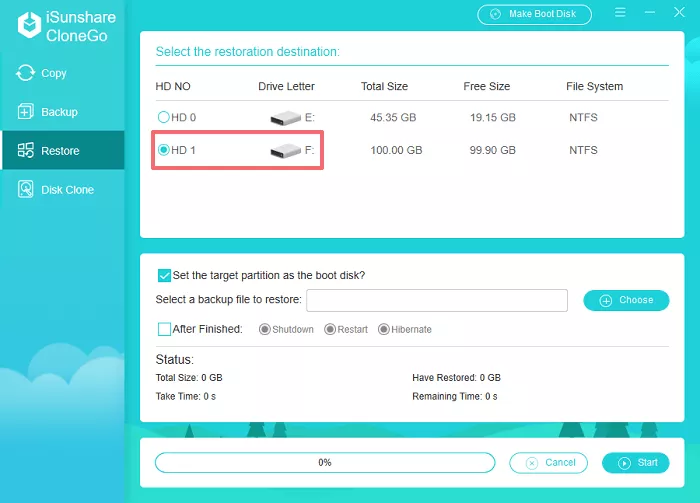
Step 3: Choose the backup file (.icg) to restore from.
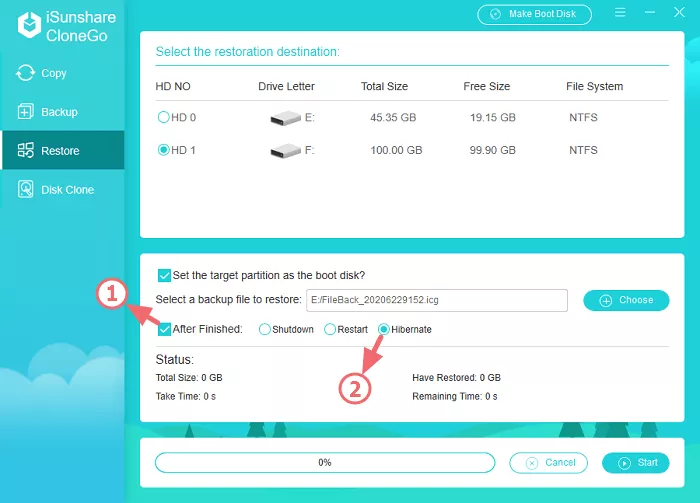
Step 4 ( optional ): For system backups, set the target as bootable.
Step 5 ( optional ): Configure post-restore actions if desired.
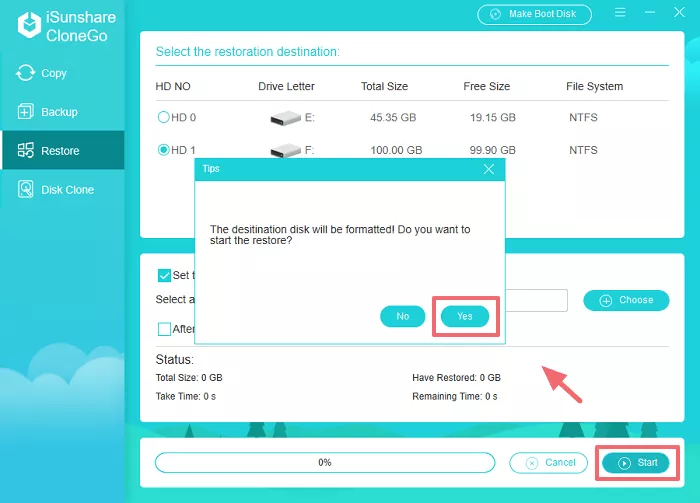
Step 6: Click "Start" to begin restoration.
Step 7: After restoring, you'll need to set the target partition as the boot partition in the Boot Menu.
Step 1: Connect your target drive and launch CloneGo.
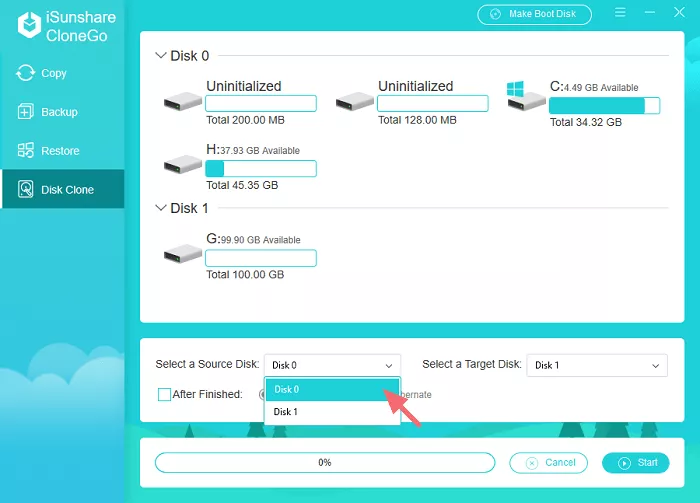
Step 2: Select "Disk Clone" from the menu.

Step 3: Choose your source disk to clone.
Step 4: Select the target disk for cloning.
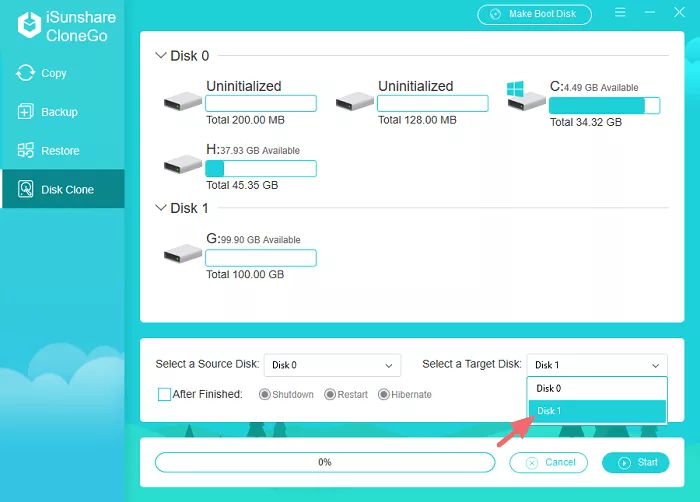
Step 5: Set post-cloning actions if needed.

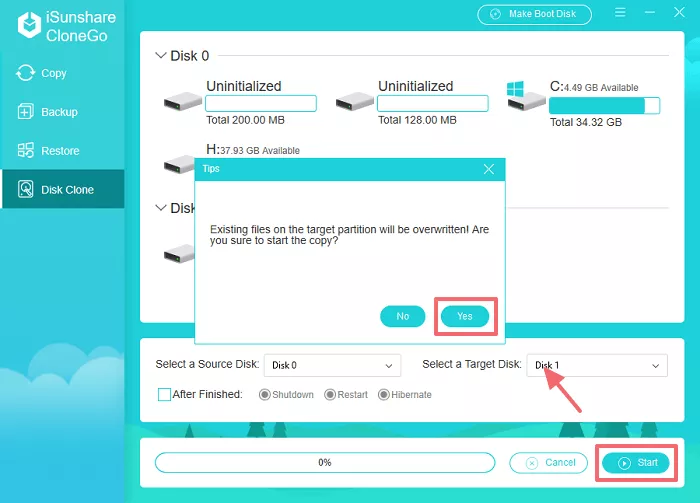
Step 6: Click "Start" to begin the cloning process.
Step 7: Once complete, you can boot from the cloned disk by adjusting BIOS/UEFI settings.
Step 1: Use CloneGo to create a WinPE USB on a working Windows computer.

Step 2: Boot the target computer using this WinPE USB.
Step 3: In the WinPE environment, use CloneGo to:
Detailed Tutorials: How to Copy Windows OS without Reinstalling in PE Mode
This method allows you to access and manage data on computers you can't log into normally.
Copyright © 2004 - 2022 CloneGo. ALL RIGHTS RESERVED.